Tuesday, November 29, 2011

Ch-Ch-Ch-Chia Seed Crackers

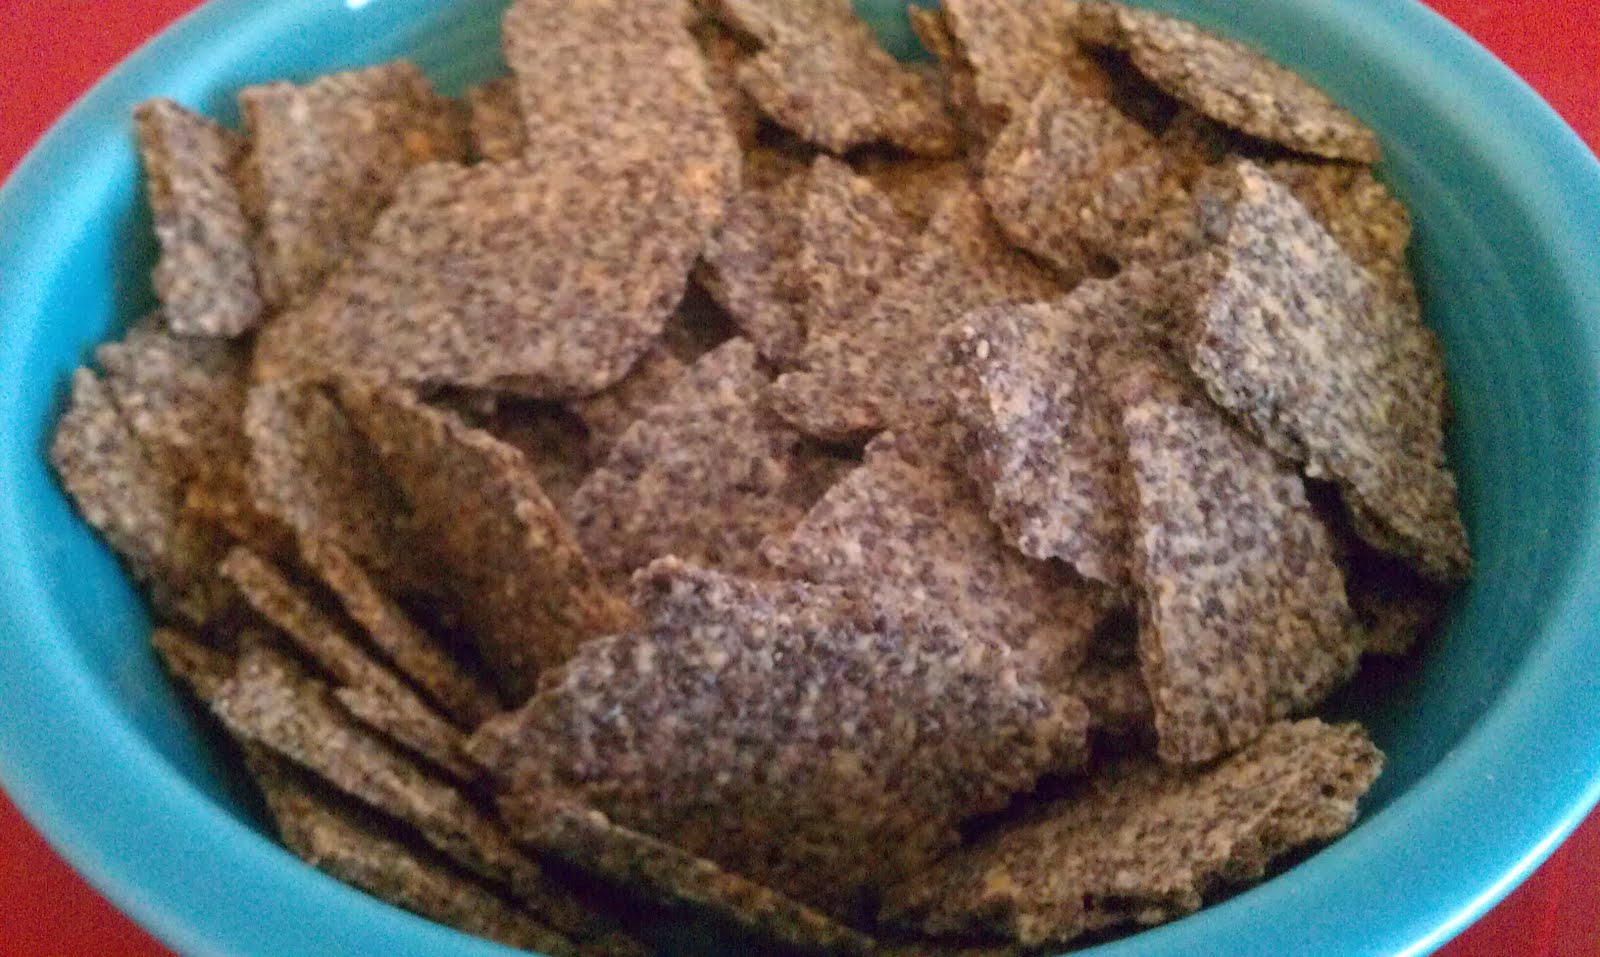
So, the title of the post says it all. I never thought this day would come, but it did. I made crackers successfully for the first time (after another failed attempt, but I won't go into that). This time, the crackers were meant to satisfy my low-carb-want-something-crunchy-and-salty tooth. Let's just say they do the trick!
So, I was looking at recipes for ideas. A lot of them had flaxseed in them, which is great, as it has lots of protein, fiber, and is low in carbs. The only problem is that I didn't have any flax on hand. Then it hit me. Isn't chia seed also full of fiber and protein AND packed with omega-3?! Doesn't it also act as a coagulant in baked goods? Aha! So, I took out the chia seeds, ground them in my blender and got to work. This is what I came up with. You can tinker with the spices, or even the kind of cheese you use, just adjust the water content accordingly. Enjoy!

Chia Seed Crackers

Preheat oven to 400 degrees

1 c. chia seed meal (1 cup chia seeds ground in a blender/food processor)
1/3 c. grated parmesan cheese
1/2 c. water
1 1/2 tsp. garlic powder (more or less depending on personal preference)
herbs/spices (mix and match!): cayenne pepper, rosemary, oregano, basil, cracked pepper.

Mix all ingredients in a bowl until mixture resembles a dough. Place dough on a silpat or parchment paper-lined cookie sheet. Roll dough to 1/8 in. thickness using a rolling pin. Cut into shapes using a pizza cutter or cookie cutters. You can also break the crackers by hand after they have cooled.
Bake for 15 minutes, or until the center is hard to the touch.
Let cool on cookie sheet. Enjoy!

Wednesday, November 9, 2011

A Whole New World

It's November already?! Where did the time go? It's crazy to think I've been a resident of Miami Beach for a whole month. One very action-packed month. Moving is hard, leaving your friends is even harder, but getting acquainted with a new city, new orchestra, and new smiling faces makes all of the unfamiliarity a little easier to handle.
One thing I've learned living in close-proximity my co-workers is that nothing brings people together faster than ________________ (insert name of baked good). Baked goods are an instant ice-breaker/conversation-starter.
Good thing the people here like to eat...

When baking for a crowd, nothing is easier to transport frosting to people's mouths faster than a cupcake. I mean let's be honest, the cake is just a pedestal for the dollop of heaven on top of it. It's also the perfect showcase opportunity for baker's bling. I love me some good cupcake bling. I was even inspired by my new job, and decided to make some New World Symphony logo cupcakes (first photo). The pictures below are samples of what I've made this year. See below for how-to instructions for the decorations.


For the NWS cupcakes, I piped the frosting with a large star tip, then made free-hand chocolate decorations. For the decorations, melt 1 cup semi-sweet chocolate chips in a microwave safe bowl on high for 1 minute, stirring at 20-second intervals. Pour the chocolate into a plastic zip-top bag, and cut off one of the bottom corners of the bag. Pipe the chocolate onto a cookie sheet lined with wax paper. When finished piping all of the designs, place cookie sheet in refrigerator for at least 10 minutes to let chocolate set, or longer for larger decorations like the musical notes (pictured above on the red velvet cupcakes). For the spider webs, use the same recipe, only substitute white chocolate. If you would like consistent chocolate designs, I recommend drawing or printing off a template of the design onto some paper, and slipping the template underneath the wax paper before piping the chocolate.

For the flower cupcakes, I used fondant icing. I loved playing with play-dough as a kid, so this is like the adult version of play-dough. Roll fondant (either store bought, or homemade marshmallow fondant will work) to approximately 1/8 of an inch onto a cornstarch dusted flat surface. Use your choice of flower, or other shaped cutter. Place flower into a small cupcake pan to retain flower shape. Let dry thoroughly. When dry, dust edible luster dust in your desired color onto fondant pieces. I used gold and daffodil colors for my flowers.